 WebIssues Manual
Version 1.0.5
Even if you are using views and automatic statuses of issues, it's not always visible at the first glance that there is a new or modified issue that requires your attention. Because of that, the WebIssues system has a mechanism of alerts, which are automatic notifications about unread issues that meet certain criteria.
You can create an alert using any public or personal view, as well as the built-in “All Issues” view. Each alert is assigned to a specific folder.
Suppose you want to keep an eye on active bugs and tasks which are assigned to you. Open the Bugs folder and select Manage Alerts. The list of alerts is initially empty, so choose Add Alert to define a new alert for this folder.

Select the “Active Bugs” view and click . The list now contains a new alert, and also displays the total number of all issues that meet the criteria of the view, and the number of unread and modified issues.
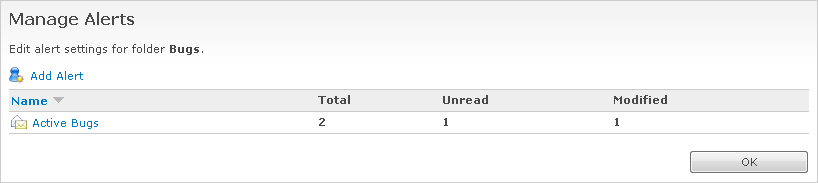
If the alert contains unread issues, its icon will change to a closed, yellow envelope. Similarly, if it contains a modified issue, a green envelope will be displayed. So by opening the alerts window, you can quickly see if there are any issues which require your attention.
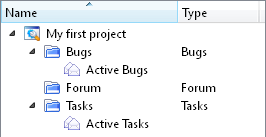
Now repeat the same steps to create an “Active Tasks” alert in the Tasks folder. If you are using the Desktop Client, you will notice that the alerts are visible in the projects and folders tree:
The program periodically updates the contents of all folders for which you've defined alerts, so you can track their status almost in real time. If in any of the views there are some unread issues, the icon of the alert will be changed, its name will become bold, and the number of new and modified issues will appear in parentheses:
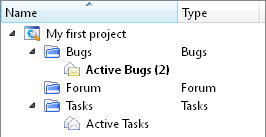
If you click on an alert in the tree, not only the folder, to which the selected alert belongs, will be opened, but also the view associated with this alert will be automatically selected. This mechanism is therefore very helpful in everyday work.
Tip
Create alerts only if you really needed them. A large number of alerts will distract your attention, and in addition will increase the time required to refresh all folders.
If sending email notifications was enabled in the WebIssues system, you can configure the way of sending notifications for each alert.
Note
For more information about setting up email notifications read the the section called “Email notifications” section.
There are three types of notifications available in the WebIssues system:
- Immediate notifications
-
Sent immediately when someone adds or changes an issue which meets the criteria of the alert.
- Summary of notifications
-
Sent at specified days and hours, if someone adds or changes issues related to the alert.
- Summary reports
-
Always sent at specified days and hours, regardless of whether any changes have occurred.
How often immediate notifications are sent, depends on the configuration of cron job on the server. You can therefore receive them every few minutes or every hour.
In order to receive notifications, you must change your user preferences. If you are using a browser, click Tools and then User Preferences. To change them in the Desktop Client, select User Preferences from the main window toolbar.
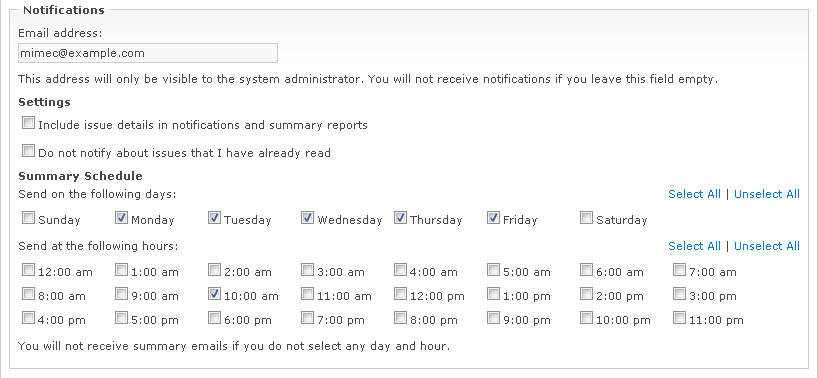
Enter a valid email to which the notifications will be sent. Select Include issue details in notifications and summary reports, if you want the emails to contain also issue details and the history of changes and recently added comments and attachments. Otherwise only a summary of issues will be sent.
Select Do not notify about issues that I have already read if you don't want to receive notifications about issues that you've read (for example, if you created or modified them by yourself). Also issue details, that you've read, will not be included in that case. This option doesn't affect summary reports, which always contain all issues and changes.
Also set up the notifications schedule, by selecting days and hours at which the summary notification and summary reports will be sent. Depending on your needs, you can receive a summary once a week, several times a week, at a specified time every day, or several times a day.
Warning
You won't receive any notifications if you don't set the correct email address in your user preferences. You won't receive the summary emails, if you don't select any day or hour.
The type of notification can be specified when you create an alert. You can also change it at any time for an existing alert. To do this, select the alert in the alert management window and select Edit Alert.
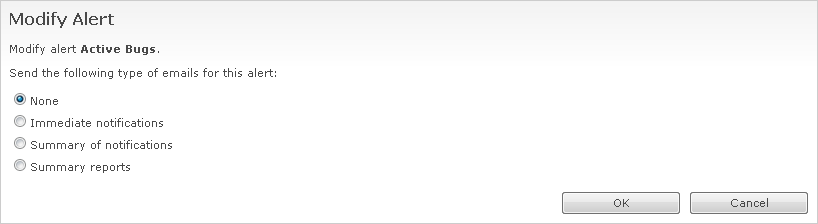
Immediate notifications are useful if you want to be kept informed of any changes, and you don't use the WebIssues system all the time. If an alert generates too many notifications, or if they are not very urgent, you can choose a summary of notifications instead, to receive aggregated information about recent changes, for example, once a day.
Summary reports contain a list of all issues, regardless of whether they have been changed since the last notification, and whether they were read by you. They are useful if you want to track the status of all issues that meet specific criteria, for example, to check whether the active bugs are being solved continuously.
All email notifications include the name of the associated project, folder and alert in the header, and also the list of issues. The list contains the same columns as the view which is associated with the alert.

If you selected the appropriate option, email notifications will also include details of each issue, similar to the issue details view in the main window of the program.