 WebIssues Manual
Version 1.0.5
Click on the folder named Bugs to open it. If you have just created a new server, the folder will be empty, so let's start with creating the first issue.
Select the Add issue command (if you are using the Desktop Client, you must click on the list of issues for the command to appear). The following window will be displayed:
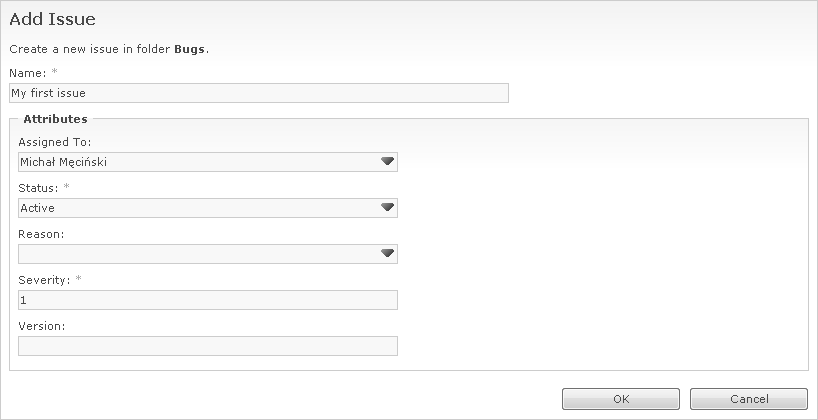
The name of the issue is a required field, so let's type “My first issue”. The remaining fields are the attributes of the issue. Status and Priority are also required fields, but they have a default initial value. Depending on the type of the attributes, they accept different kinds of values:
- Text
-
It's the simplest attribute that can have any value. It may have a specified minimum and maximum length. It may also be a single line of text or a field where you can enter multiple lines of text. An example of a text attribute is the Version field.
- Dropdown list
-
This attribute accepts one of the specific values, just like the Status field, where you have to choose one of Active, Resolved or Closed. There is also a variant of this attribute that accepts any value, and the list is merely auxiliary, and another variant where you can enter mutliple values separated with commas.
- User
-
The value of this attribute can be the name of any user of the WebIssues system or a member of the project. The Assigned To field is an example of such attribute. There is also a variant where you can select mutliple users separated with commas.
- Numeric
-
The value of this attribute can be an integer or a decimal value with specified number of decimal places. It may have a specified minimum and maximum value. An example of a numeric attribute is Severity, which may be in the range from 1 (most critical bug) to 3 (insignificant bug).
- Date
-
The value of this attribute can be any valid date that can be entered manually or selected using a drop down calendar. An example is the Due Date attribute of the Tasks issue type. There is also a version accepting both date and time.
For starters, assign the bug to yourself and change its severity to 1 — after all, it's the first bug recorded in the system.
Tip
If you don't see some user in the drop down list, it probably means that the user was not added to the project members; see the section called “Managing users”.
Then press . If the value of one of the attributes is incorrect, you will receive an error. Otherwise, the new issue will appear in the list and its details will be displayed below:
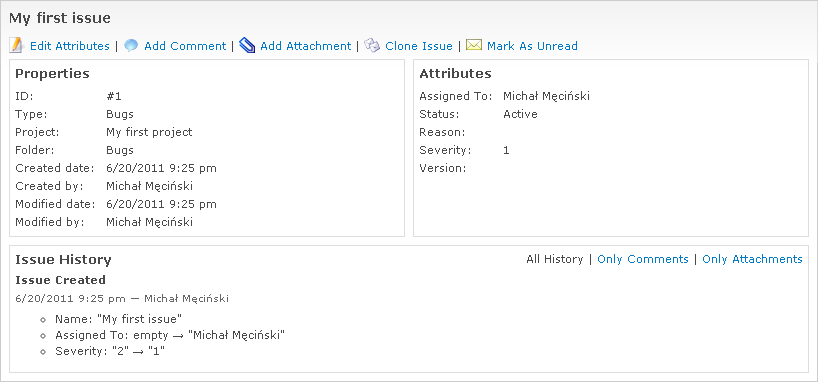
For now, it doen't look very impressive. The system has registered that you have created the issue, you gave it the name and changed the value of two attributes. Now let's write a comment. To do this, choose Add Comment (make sure that the history of the issue is the active panel, if you are using the Desktop Client).
The new window consists almost entirely of a text edit box. In case of the Desktop Client, you can leave this window open and return to another window, for example, to view the history of the issue. Using a web browser you can also add a new comment in a separate window, if you right-click on the link and select an appropriate option.
Returning to our window, type the text of the comment regarding the first issue:
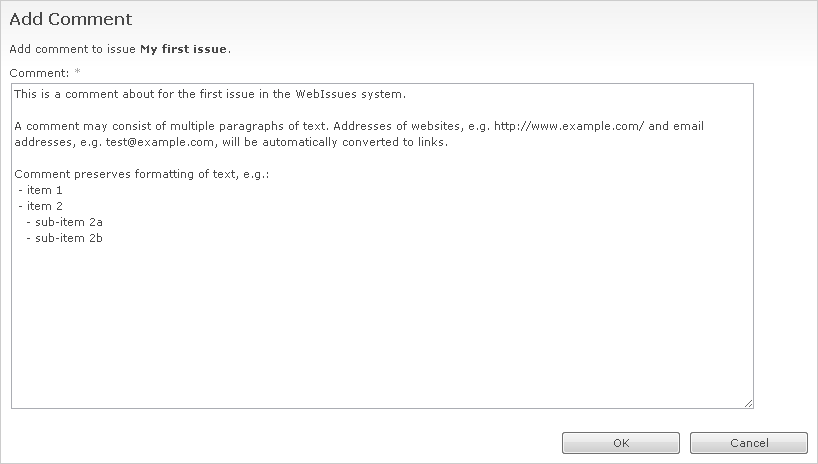
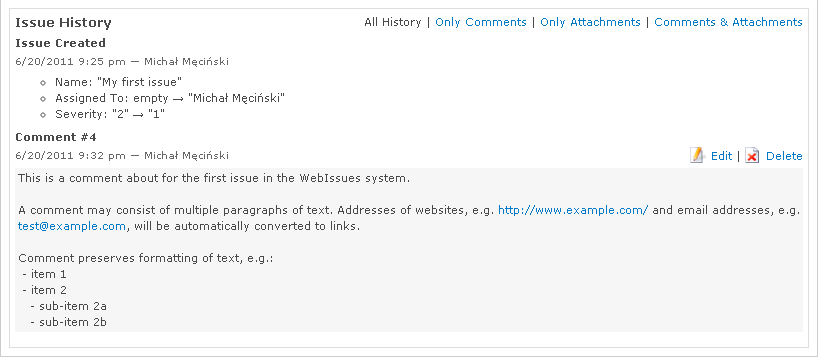
The text will appear exactly as typed, with all spaces and new lines preserved. This allows you, for example, to paste fragments of code and error logs without worrying that they will become unreadable. Long lines are automatically wrapped, depending on the width of the window. Web addresses and email addresses are automatically converted into clickable links.
Tip
Automatic recognition of links works not only in the text of comments, but also in the names of issues and attribute values, and even in descriptions of attachments.
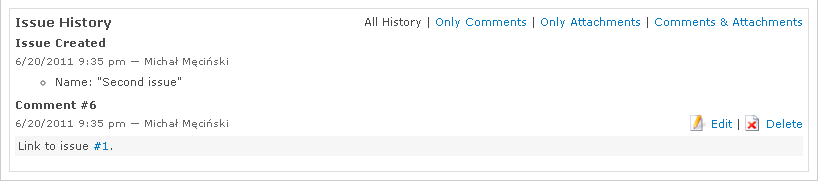
You can also create links to other issues and to comments or attachments. To demonstrate this, let's create another issue called “Second issue”, leaving the default values of attributes. Let's assume that the identifier of the first issue is #1, and the second is #5.
If you add a comment to the first issue, and type “#5”, it will be replaced with a link to the other issue. Similarly, if you now add a comment to the second issue, writing “#1”, it will become a link to the first issue. In this way, you can create links between issues, refer to other comments in your own comments, etc.
Note
Identifiers of issues are unique and increasing, but not necessarily in consecutive numerical order. In our example, the ID of the second issue is #5, not #2, because the identifiers are also assigned to comments, attachments and other changes, making them easier to manage by the system.
To quickly go to the issue, comment or attachment with the given identifier, you can also use the Go To Item command. In the Web Client, click Tools in the the upper right corner of the window, then click Go To Item. In the Desktop Client this command is always available in the the main window toolbar, you can also press Ctrl+G.

Then enter the identifier you are looking for and press . If there is an issue with this identifier, it will be displayed. If the identifier represents a comment or an attachment, you will see the issue which contains the item, and the history will be scrolled to the item.
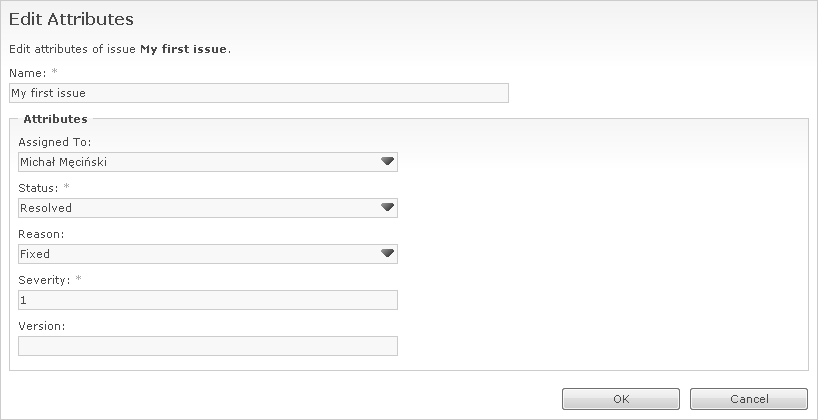
The Edit Attributes command allows you to edit issue, i.e., change the value of each attribute and the name of the issue. Select the first issue and select that command. You will see the same window as in case of adding a new issue, containing current values of attributes. Change the status of issue to Resolved, and select Fixed in the Resolution field. Then press to save your changes.
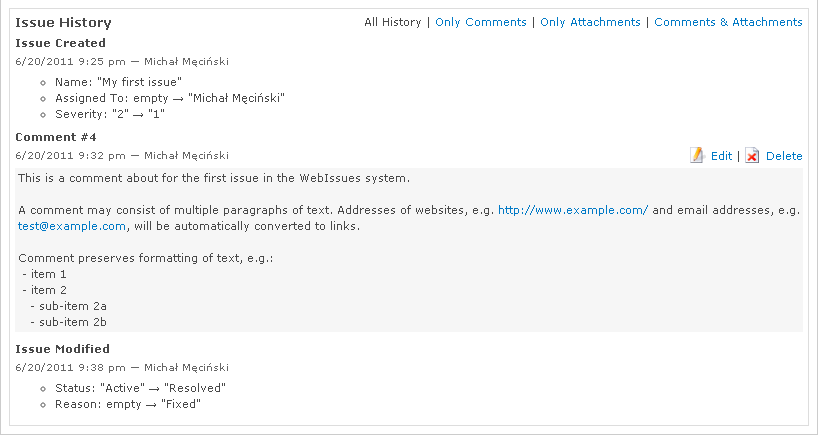
Note that the WebIssues system automatically remembers your changes and displays them in the history of the issue. This allows you to track the entire life cycle of the issue, changes of its status and all operations performed with the issue.
By default the issue history contains all changes, comments and attachments. If you don't want to see the full history of the issue, but for example only comments, select one of the filtering options available in the upper right corner of the history view. To search for a specific text in a comment or another change, in the Desktop Client you can use the Search command or press Ctrl+F to display the search bar. Enter the text you want to search and then use the F3 and Shift+F3 keys to find the next or previous occurrence of text in the history of the issue. In the Web Client you can use the search function of the browser.
You already know how to add a comment to describe the issue or discuss it. However it's better to add long passages of text (such as error logs) as separate attachments. This way you can also attach image files, documents and other types of files to the issue, just like attachments to email messages.
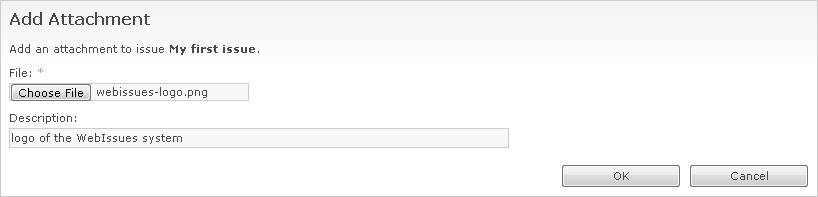
To attach a file, select Add Attachment. Then select the file you want to add, and optionally enter a brief description of the attachment.
The new attachment is visible in the history of the issue:
Click the link to open the attached file or to save it to disk. The Desktop Client by default always asks if you want to open or save the file. You can also right-click to select the appropriate option from the context menu. By changing the program settings you can select the default action for attachments, and change the maximum amount of disk space used to store temporary files.
In case of the Web Client, depending on the file type and the configuration of your browser, clicking on a link will open the attachment or save it to the disk. Images and text files will generally be opened directly in the browser. In most browsers you can also click the right mouse button above the link to choose an action from the context menu.
Note
The maximum size of files which can be attached to an issue depends on the configuration of the WebIssues system. You can change it in the WebIssues system settings (see the section called “Advanced settings” for more information). Uploading large attachments also requires appropriate configuration of the web server and PHP. For more information, please visit http://php.net/manual/en/features.file-upload.common-pitfalls.php.
By default, small attachments are stored in the database, and large files are stored directly in the file system. Depending on your needs, you can change the threshold value or force storing all attachments only in the database or the file system, by changing WebIssues system settings. For client applications it doesn't matter how the attachments are stored.