 WebIssues Manual
Version 1.1.5
After installing the new WebIssues server, it contains initial configuration and settings, but before you can start using it, you have to do a few more things. First, you must create accounts for users that will use the system. Secondly, you need to create projects and folders in which the issues will be stored.
Let's start with creating user accounts. Click the Administration Panel link in the upper right corner of the window, then select User Accounts. You should see a single user named Administrator, which was created by the installer.
Create your personal account, so you don't have to log in as Administrator. To do this, click Add user, then enter your name and the login and password that you will be using to log into the system. Then press .
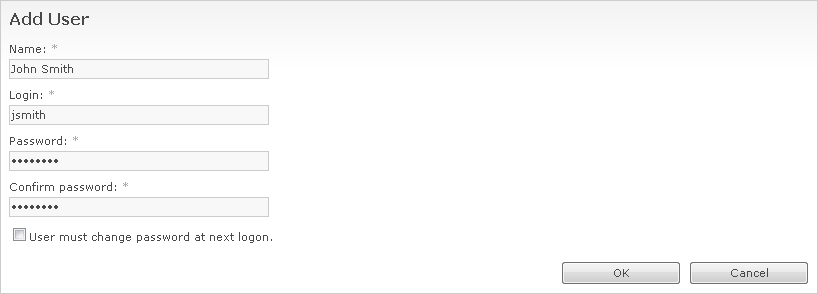
Repeat the above steps to create accounts for other people who will use the system. For each of them you need to specify the initial password, but for greater security, you can select the User must change password at next logon option, if you want them to set their own password when logging into the system.
In the WebIssues system there may be more users with administrator privileges. To change permissions of a user, select him by clicking his name in the list, then click Change Access. You can choose the System Administrator or Regular User permission, and also disable access to the system for given user. Press to confirm the changes.
Tip
The System Administrator has access to the Administration Panel, and is the administrator of all existing projects, even if he's not explicitly their member. Thus grant this permission only to persons that you trust.
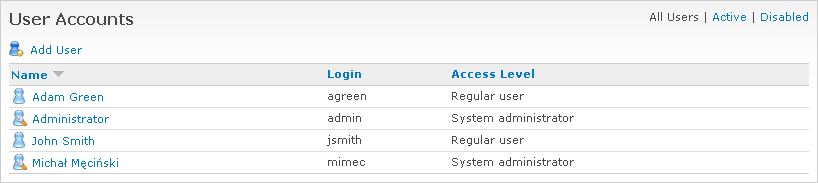
A configured list of user accounts may look like the figure below:
For more information on administering user accounts, read the section called “Managing users”.
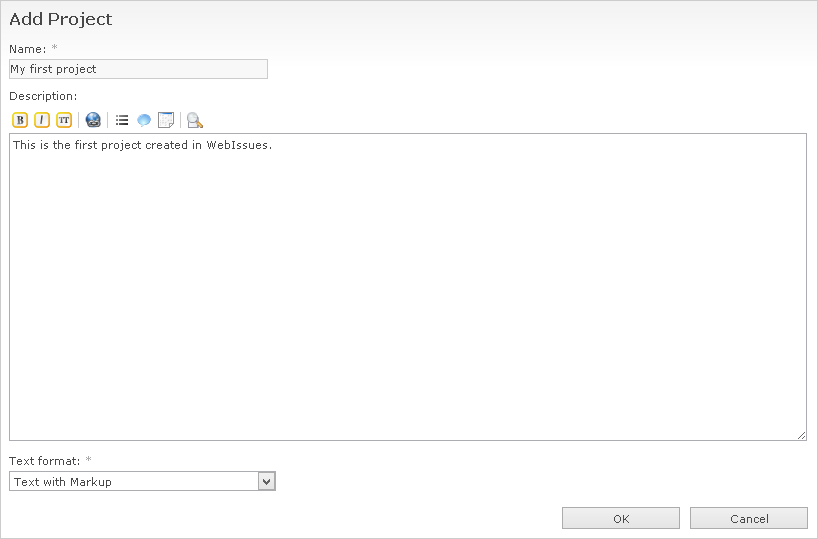
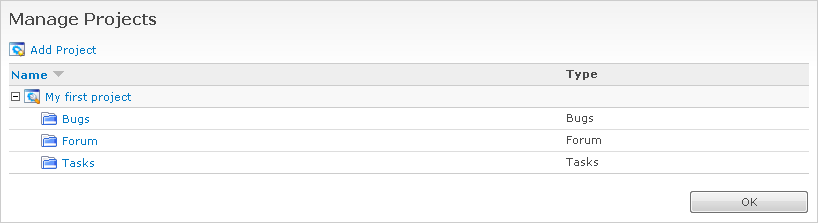
Click on the Web Client link in the upper right corner of the window to go to the main part of the WebIssues system. On the left you'll see an empty projects and folders tree. Click Manage Projects and then use the Add Project command to create the first project. Name it “My first project” and press .
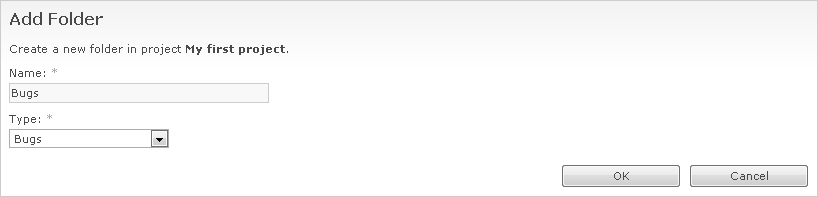
The new project will appear in the tree. Click on this project to select it, and you will see a number of operations that you can perform on that project. Let's begin by creating folders. Click Add Folder and create a folder called “Bugs”, selecting the type of issues with the same name.
After creating a folder, it will be displayed in the tree below the project. Select the project again and add another folder of type Tasks. Then repeat the same step to create a Forums folder. The projects tree will look like this:
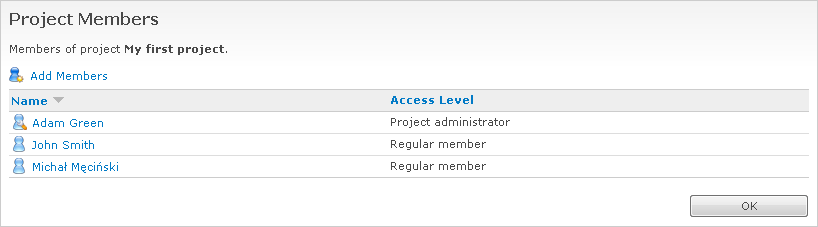
For now, the newly created project is only available to system administrators. To grant access to other users, select the project and click Project Members. You will see an empty list. Now click Add members and select all users except the Administrator account. Click .
You can also assign an administrator right for the project to selected members. Select a user and click Change Access. Then select the access level in a similar way as in case of changing user's access to the system.
Tip
The Project Administrator can create and modify folders, modify the project description and change permissions of other users for this project. He can also delete issues and delete and modify other users' comments.
A configured list of members of the project may look like below:
Click to return to the main window. The project and folders will appear in the tree on the left side on the window. Also the global lists of issues for each of the issue types will appear in the tree.
Tip
If you use the Desktop Client, the commands for managing projects and folders are available directly in the main window of the program. Activate the projects tree by clicking on it to be able to access these commands (provided that you have appropriate permissions).
Read the section called “Managing projects” later in this book to learn more about administration of projects and folders.