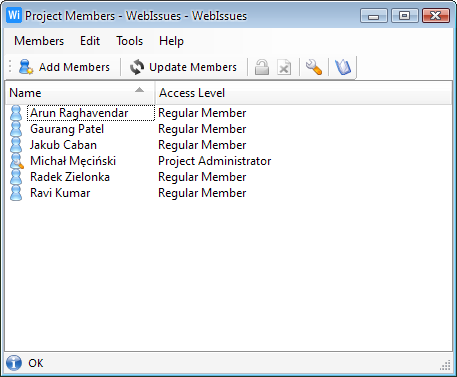
The Members Window shows a list of users who have access to a particular project. It allows project administrators to add and remove members and change their access level. To open the Members Window, select a project in the Main Window and select → .
The main part of the Members Window is the list of user accounts. For each user the name, login and access level for the project is displayed. You can double click a user to quickly change the access level. Right clicking in the list opens a context menu containing available options. You can select more than one user to change access or remove multiple members at once.
The list of members is periodically updated to synchronize with changes made on the server and every time you make a change. You can also force updating the list manually by selecting → .
Options for adding, removing and changing access for project members are only available for project administrators and system administrators. Only users who were added as members of the project are displayed in the list.
- (Ctrl+N)
-
Add new members to the project.
-
Update the list of members.
- (Ctrl+W)
-
Close the Members Window.
The following access levels are defined for project members:
- Regular Member
-
Regular members can view the contents of folders and details of issues within the project. They can also create issues, modify existing issues, add comments and upload and download attachments.
- Project Administrator
-
Project administrators are members who can also change the membership of the project and create, modify and delete folders within the project.
Changing project membership is effective immediately. The user doesn't have to log in again to see the changes.
Copyright © 2007-2009 WebIssues Team
