
The Issue Window shows current details and the full history of a single issue. It allows to modify the values of attributes, add comments and upload and download attachments. You can open this window by double clicking an issue in the Folder Window. You can also open the issue by entering its identifier in the Find Dialog or by clicking a Smart Link.
When the new three-pane layout of the Main Window is used, the Issue Window is embedded into the bottom right pane when an issue is selected in the top right pane. When the issue pane is activated with a mouse click or using keyboard, its commands are merged into the menus and the tool bar of the Main Window. Also smart links and newly added issues are opened directly in the Main Window when the tree-pane layout is used.
The details and history of the issue is automatically updated when you open the Issue Window. It is also updated whenever a change is detected after updating the folder containing the issue and after each change that you make. To manually force an update, select → .
By default, the Issue Window has three separate tabs: Issue Details, Issue History and Attachments. You can also make the issue details appear to the left or above the history and attachments by changing the layout of the details view in WebIssues Settings. This setting affect both the standalone Issue Windows and the one embedded into the Main Window.
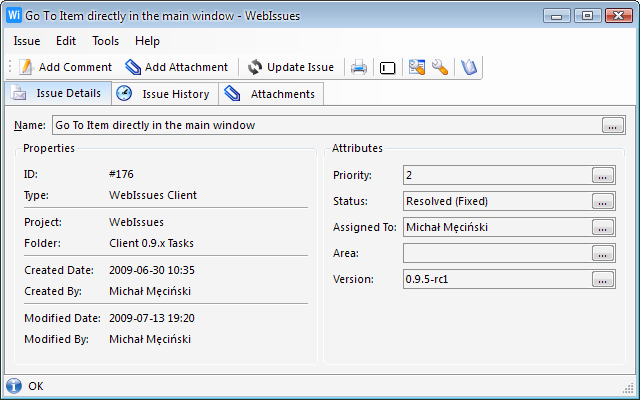
The Details Tab displays the name of the issue, its properties (also called system attributes) and the user defined attributes depending on the type of the issue. The links in the name and attribute boxes are click-able (see Smart Links). The values of both properties and attributes can be selected and copied. You can change the name of the issue by selecting → or by clicking the button in the right part of the box containing the name. You can change the value of each attribute by clicking the appropriate button and entering the new value in the Value Dialog.
By default, attributes are displayed in alphabetical order. You can change the order of attributes by selecting → . Select the attribute that you want to move and use the arrow up and down buttons to change its position. The configured order of attributes is remembered for all issues of the same type.
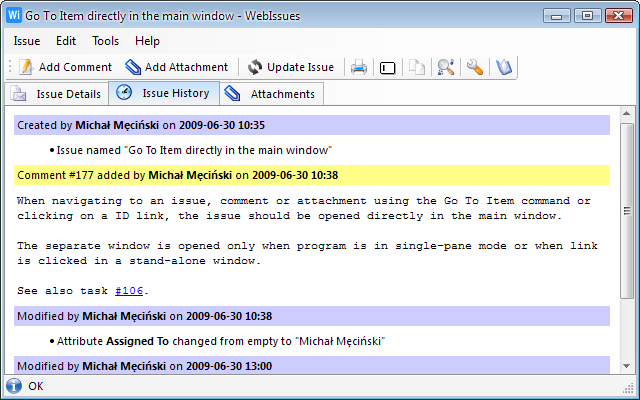
The History Tab contains a browser displaying the full history of the issue in chronological order since its creation. It combines changes of attribute values, comments and attachments. The header of each change contains the identifier of the comment or attachment, the name of the user who made the change and the date of the change. The history browser displays click-able Smart Links where appropriate.
All changes of attribute values are automatically recorded. Both the old values and the new values are displayed in the history. Changes made by one user in a short period of time are merged together.
To add a new comment to the issue, select → . A Comment Window will be opened allowing to enter the new comment.
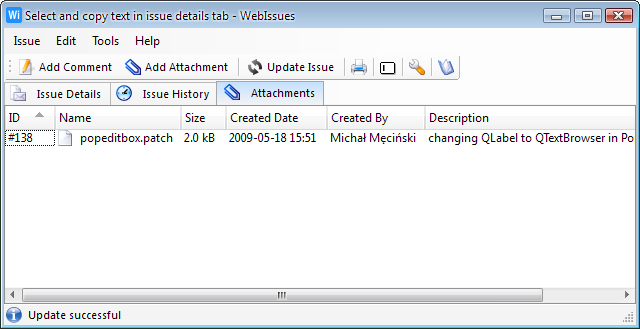
The Attachments Tab contains a list of attachments added to the issue. You can open or download an attachment by double clicking it and selecting the appropriate action. If you choose to open the attachment, the appropriate application is automatically started. If you choose to save the attachment, you are prompted for the target location. You can configure WebIssues to always perform the selected action without displaying the message box. You can also right click an attachment and select the action from the context menu.
To add a new attachment, select → and choose the file to upload. You can edit the name of the attachment which by default is the same as the name of the file. The name cannot exceed 40 characters and is truncated if necessary. You can also enter an optional description of the attachment. While uploading or downloading an attachment, a progress bar displays the amount of already transfered data.
Tip
All opened and downloaded attachments are cached in a temporary location. You can select the maximum size of the attachments cache using the Advanced Settings tab of the settings dialog.
- (Ctrl+N)
-
Open the Comment Window allowing to add a new comment to the issue.
-
Add a new file attachment to the issue.
-
Update the details and history of the issue.
- (Ctrl+P)
-
Print the report containing details and optionally the history of the issue.
-
-
Save the report as a document in HTML format.
-
Save the report as a document in PDF format.
- (Ctrl+W)
-
Close the Issue Window.
- (F2)
-
Rename the issue.
- (Ctrl+C)
-
Copy selected text in the history browser to the clipboard.
- (Ctrl+A)
-
Select all text in the history browser.
- (Ctrl+F)
-
Show the Find Bar allowing to find a word or expression in the history browser.
- (F3)
-
Find the next occurrence of the searched text in the history browser.
- (Shift+F3)
-
Find the previous occurrence of the searched text in the history browser.
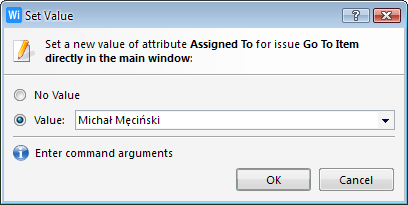
The Value Dialog allows to change the value of a single attribute. To open it, switch to the Details Tab and click the button in the right part of the box displaying the value of the attribute that you want to change.
The way the new value is entered depends on the type of the attribute:
-
an edit box is used to enter free text
-
a numeric box with arrow buttons to the right is used to enter a number; it can be an integer value or a fixed point decimal fraction
-
a drop-down list is used to select one of the allowed values or a user; if allowed, a custom value can also be entered in the box
-
a combination of boxes is used to select the day, month, year and optionally time; date can also be selected using a drop-down calendar control
You can also select the No value option to clear the current value of the attribute. This option is not available if this is a required attribute.
Each change of the attribute value is applied immediately when you click in the Value Dialog and automatically appended to the history of the issue.
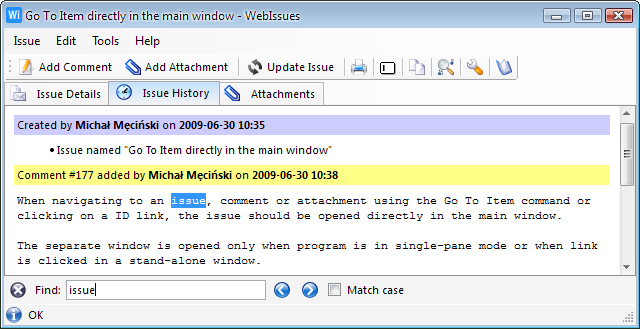
The Find Bar allows to find a word or phrase in the history of the dialog. To open it, switch to the History Tab and select → . When you type the text in the edit box, matching text is automatically selected in the history view. Use the navigation buttons or the → and → options to find the next or previous occurrence of the searched text. The Match case check box allows to turn case sensitive searching on or off.
Tip
You can use the F3 key to quickly activate the Find Bar. When active, press Enter to find next occurrence or the text or Esc to cancel searching.
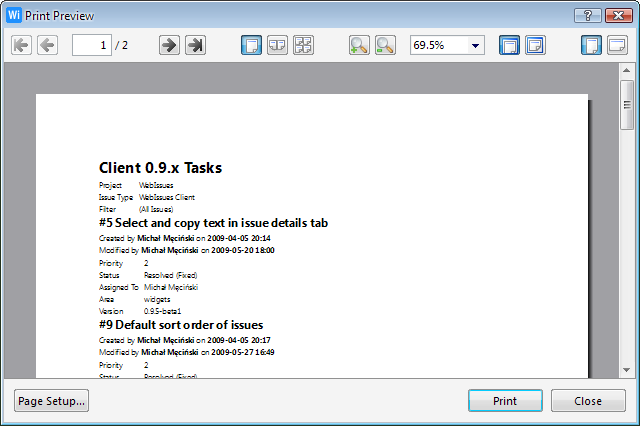
You can generate reports containing information about the current issue in two modes. The summary report displays basic information about each issue, including current values of all their attributes. The full report also includes full history of the issue in a similar format as the one used on the Issue History page.
The report can be either directly printed or exported as a document in HTML format or PDF format. When printing the report, you can select the printer to use and various options like paper size and page orientation. You can also display a preview of the report before printing it. When exporting, you just have to select the name and the location of the document. Refer to the Printing and Exporting section of the Folder Window for more information about printing and exporting reports.
Copyright © 2007-2009 WebIssues Team