
There are three types of users: regular users, server administrators and disabled users. Regular users can access projects according to their membership. Users with server administrator access are automatically administrators of all projects. In addition they can create new projects and rename and delete existing projects, create and modify users and edit issue types and their attributes. Disabled users cannot access the server at all.
To open the Users Window, go to the Main Window and select → . Everyone can view the list of users, but only the server administrators can add, rename and change the password and access rights of the users.
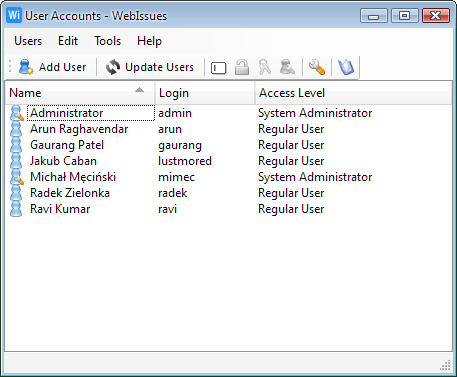
To add a new user, select → and enter the login, name and password. The login is a unique identifier of the user and the name is the display name of the user.
To rename a user, use the → command. To change the access level of a user, use the → command or a double click. To set a new password for a user, use the → command.
After installing a new server, there are some predefined types of issues. You can modify these types, create your own ones or even delete the predefined ones and create a completely different set of types and attributes.
To open the Types Window, go to the Main Window and select → . Everyone can view the existing types, but only the server administrators can modify them and create new types.
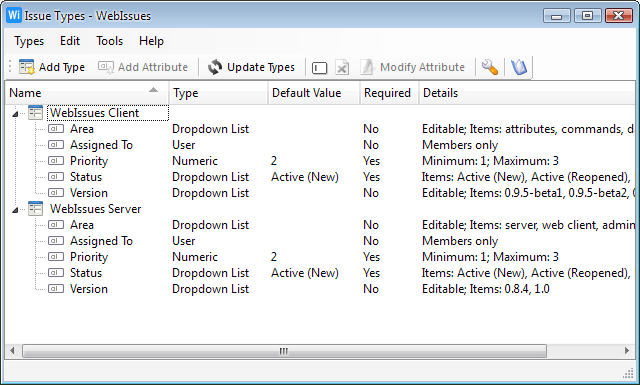
To create a new type of issue, select → . Once the issue type is created, project administrators can create folders of this type.
To rename a type, use the → command. To delete a type with all its attributes, use the → command.
To add an attribute to an issue, select → . Then enter the name and select the type of the attribute. You can also set other details like the maximum length or the minimum and maximum numeric value, specify if the attribute is required and what is the default value for new issues.
To rename an attribute, use the → command. To change the definition of an attribute, use the → command or a double click. To delete the attribute, use the → command.
Copyright © 2007-2009 WebIssues Team