
When you select a folder in the Main Window, the list of all issues in that folder will appear in the top right pane. You can also double click a folder to open it in a separate Folder Window.
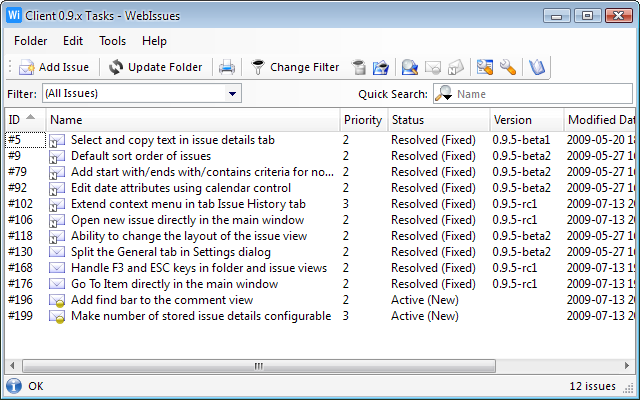
You can change the sorting order by clicking on the column's header. You can also choose the displayed columns by selecting → . Even if some columns are not visible, you can still see all attributes of an issue by holding the mouse pointer over it for a while.
You can filter the displayed issues by selecting → and defining filter's conditions. You can also select a predefined filter from the Filter drop-down list. To quickly filter issues by name simply enter the searched text in the Quick Search text box.
You can print a report containing the list of issues or export it as a document in HTML or PDF format. You can also export the list as a file in CSV format which can be imported into a spreadsheet application.
When you select an issue in the Main Window, detailed information about the issue will be displayed in the bottom right pane. You can also double click an issue to open it in a separate Issue Window.
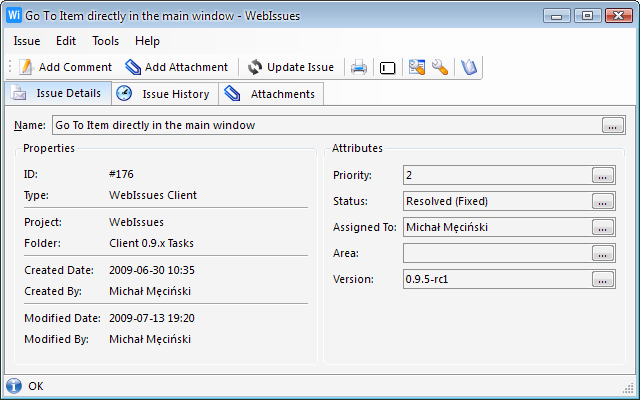
The Issue Details tab displays the name of the issue, its system properties and the current values of user defined attributes. Name and attributes are editable; you can change a value by clicking on the button in the right part of the box. You can change the order of attributes by selecting → .
The Issue History tab displays all comments, attachments and changes of attribute values in chronological order. Links in the history are click-able, you can use them to download an attachment, open a remote URL or email address or to find an item with the given identifier (see Smart Links).
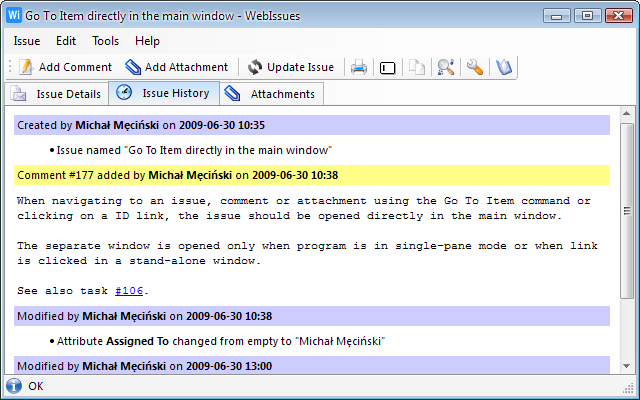
You can find text in the history by selecting → . You can also select a part of the text using the mouse and copy it to the clipboard using →
To add a comment to the issue, select → . The Comment Window will appear allowing you to type the text of the comment or paste it from the clipboard. Select → to add the comment to the issue and close the editor window.
The Attachments tab contains a list of all attachments of an issue. You can download an attachment or open it directly in the default application by double clicking it. To add an attachment, select → and select the file that will be uploaded as a new attachment. You can optionally change the name and enter a description of the attachment.
You can print a report containing the details of the issue, with or without full history of changes, or export it as a document in HTML or PDF format.
To create a new issue, open the appropriate folder, select → and enter the name of the issue to create. The issue details will open allowing you to edit the issue.
You can quickly open an issue with the given identifier by selecting → from the Main Window or the tray icon's contextual menu. Comments and attachments can also be quickly located using this command. By placing the identifier in a value, comment or description of an attachment, you can easily create links to other issues, comments or attachments.
The program can watch selected folders for new and modified issues which match selected filtering criteria. For example you can watch a folder for new and modified bugs that are active and assigned to you. The summary of all watched folders is displayed in the Dashboard tab of the Main Window:
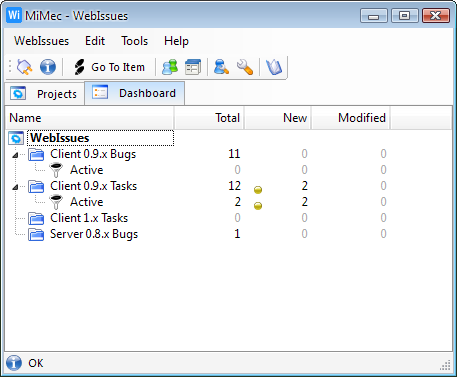
To watch a folder, select it in the Projects tab and select → . Then select filtering criteria which will be displayed in the Dashboard. Watched folders are periodically updated in the background. You can select an item in the Dashboard to display the folder in the right pane or double click to open it in a new window.
Watched folders are marked with a small colored dot in the projects tree. Yellow dot indicates that there are new issues, green dot indicates that there are updated issues. New and updated issues in watched folders are also marked with a yellow and green dot, respectively. The state of an issue is automatically reset to read when you open it; it can also be manually changed to new or read.
The WebIssues Server can be configured to send email notifications when new issues are added to subscribed folders or when subscribed issues are modified. To enable notifications for a folder or issue, use the → option. Subscribed folders and issues are marked with a small white letter 'N' on black background. You also have to enter a valid email address and choose notification frequency in the User Preferences for the email notifications to work.
Copyright © 2007-2009 WebIssues Team